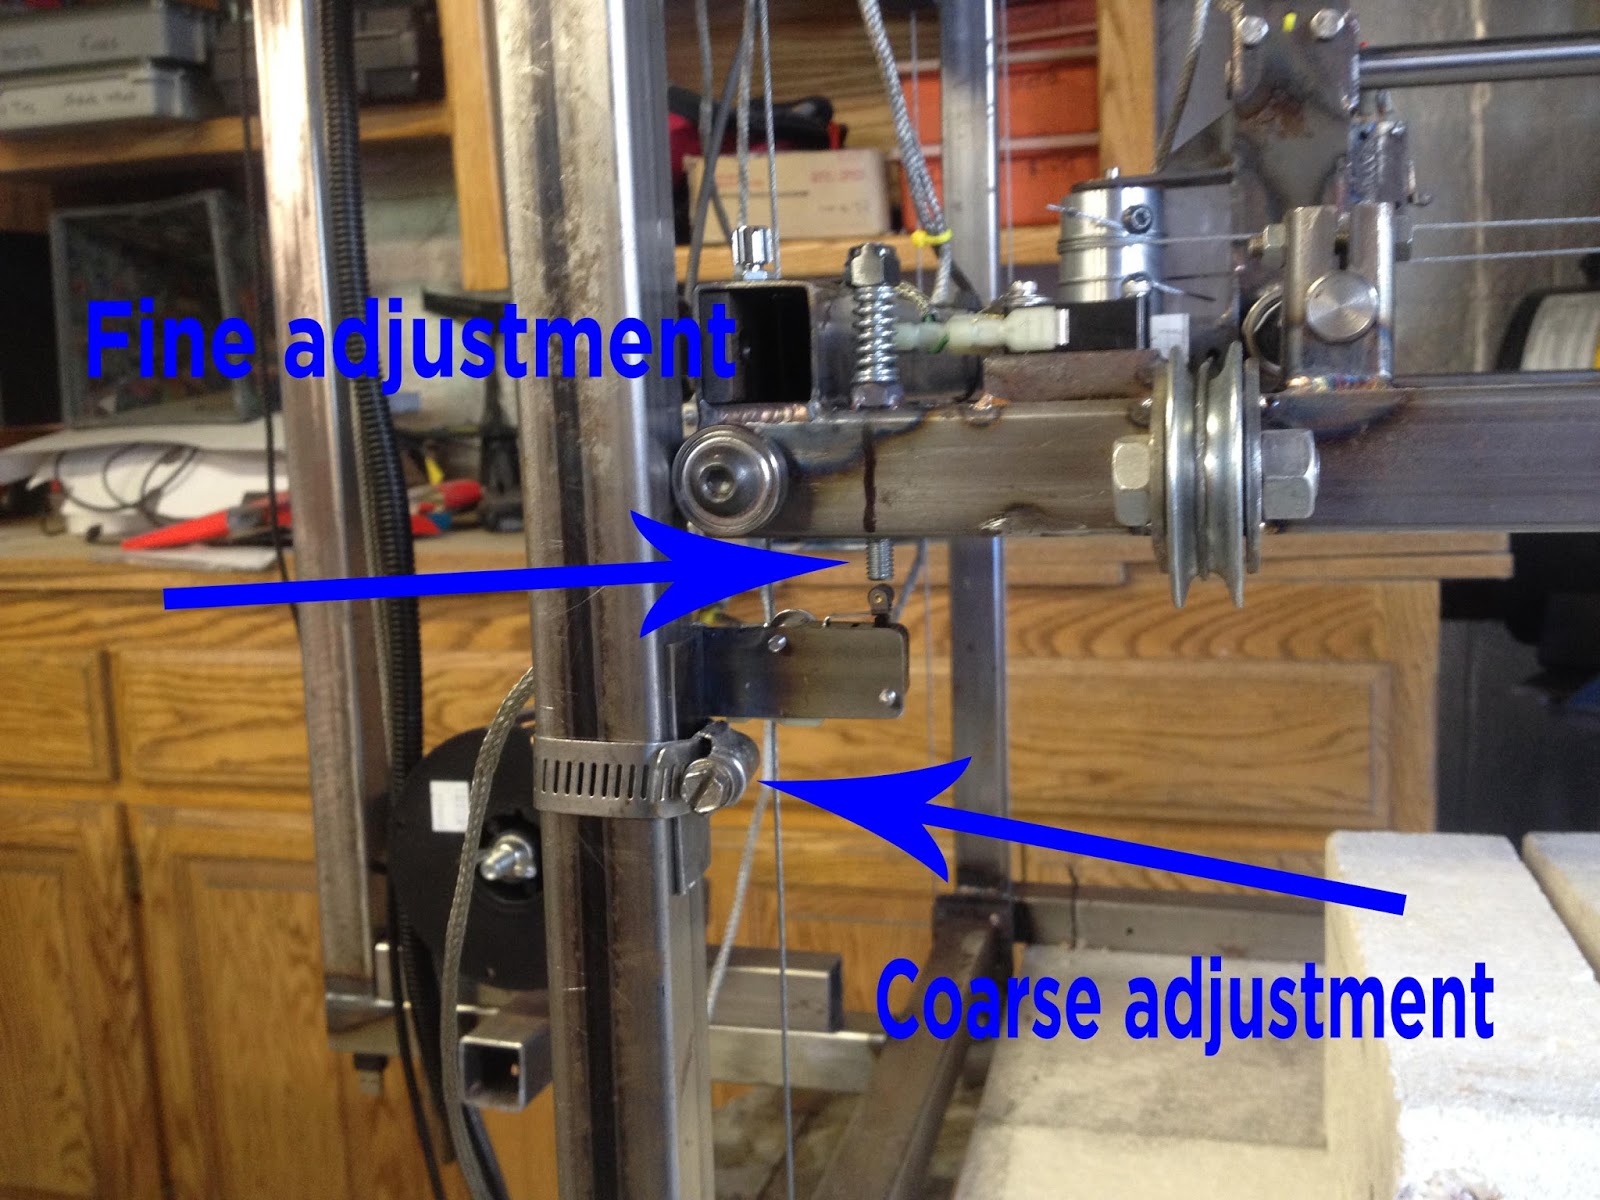
This is the fifth configuration change for the "Z" axis limit switch.
During the last round of weld testing it was discovered that the distance of the starting gap between the tungsten electrode and the build plate is crucial.
The initial size of the "air gap" was vital to how the first layer formed.
As is well known with all other types of 3D printing if the first layer goes wrong the rest of the print goes wrong.
As weld testing progressed it was found the "sweet spot" for the air gap to be plus / minus .25mm (.010")
The coarse adjustment was revision 4
Fine adjustment is revision 5

Hey just happen to see article on popsci dot com. Fabulous work so far. I have often thought about what this type of technology could mean to all of us hobbyist in the comforts of our homes without having to take a second mortgage. Having said that, I was curious upon finding "sweet spot" in terms of air gap, how large is the weld bead protruding from the surface. Also I have not read through all the blog post but do you have any intention to automate some type of second run through to grind down surface at beads offering more precision required project capabilities. Thanks for your time.
ReplyDeleteHave you seen the Matsuura ? They make a nice add / subtract metal powder 3D printing machine.
ReplyDeleteCreating a robot to weld layers reliably is a big enough bone for this old dog to chew on !
The air gap changes with the power settings. Right now at 100 amp on the dial a gap of 1.5mm. This week system upgrade is adding a volt and amp meter and a remote hand dial to control the welding power.
Got a spread sheet going of all the settings. It will make it to the blog soon.